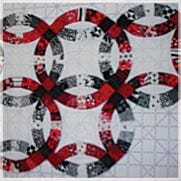
Those of you who are long time readers of this blog have seen my Double Wedding Ring quilt. I never could have done it without my GO! Well.... I COULD have...... but it would have taken me eons!
Check out the AccuQuilt post..... and be sure to sign up for their consumer newsletter to receive spotlight posts from other bloggers!
Below is the post from AccuQuilt on 4/25/12


Happily Ever After
by Sue Hauser, Alderwood Quilts
My name is Sue Hauser and I have the best job in the world! I am the owner of Alderwood Quilts, an online quilt shop. I blog, teach and sell lots of great products online. I’m proud to be associated with AccuQuilt because I honestly believe their die cutting systems help quilters, and because I know that customer service is as important to them as it is to me. Read more about blogger.
When our son told us that he was getting married, I knew that I just had to make a Double Wedding Ring quilt.
I started right away using plastic templates to cut the pieces. I soon
realized that I would have several grandchildren before I would get the
quilt finished! So I tried other approaches—paper piecing
(which I love to do), foundation fabrics, as well as other templates.
While all of these other approaches were fine, I was feeling very
overwhelmed with this project. I then saw that AccuQuilt had a GO!
Double Wedding Ring die set and thought I’d give that a try. WOW! I knew
right away that THIS was how I was going to cut my quilt!
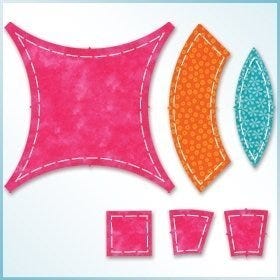
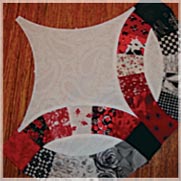
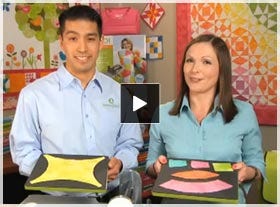
The GO!® Double Wedding Ring die set (55078) gives quilters a few different options when designing their quilts. The large shape colored in pink is the center of the block. The “football shape” (blue) is sandwiched with 2 arcs. These arc units are then nestled into each side of the center shape. You have the option of making the outer arc from one solid shape (colored orange here), or by piecing the small shapes (pink) or by using a combination of solid and pieced arcs. There are so many possibilities!
Before purchasing fabric for your quilt, you’ll need to do some planning. Decide how big you would like your finished quilt to be, and what sort of color pallet you would like to use. One finished block is 11 1/2" each direction. The last block in the row (or first block, depending on how you look at it) will need one additional arc/football unit to complete the row. This is about another 6". We’ll refer to the football shape surrounded by two arc shapes as the “arc units” here. Take your desired measurement and see how many times you can divide 11.5 (plus 6" for the extra arc unit) into that number. It might not give you your desired measurement exactly, but decide how many blocks you want to make to get as close as you can.
Each additional row will share the arc units of the
previous row on one side. (If you just multiply the number of blocks you
want to make by four—that will give you too many arc units). When you
have calculated how many centers, and how many arc units you will need,
you are ready to calculate the total number of shapes you need. You
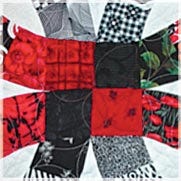
will need one center shape for each block. For each arc unit, you will
need one “football” shape, two square end pieces, six of the small
center shapes, and four of the small angled shapes. The directions that
come with the die set assign letters to the shapes and give you some
very clear diagrams to see how they all fit together.
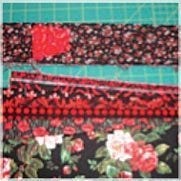
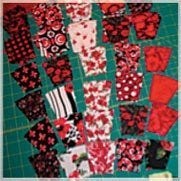
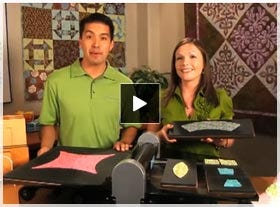
The amount of each fabric you will need depends on how you decide to arrange your colors. Figure how many of each piece you will need of each of your fabrics. To conserve fabric, you will rough-cut pieces that are a little larger than the shapes you want to cut. You can do this easily by cutting strips of fabric just a little wider than the shape. You can “accordion fold” the strip to give you six layers of fabric. After a few cuts, you’ll get into a rhythm and the cutting will go fairly quickly. I was able to cut the shapes for a king size quilt (105" x 105" - 64 blocks) in about a week, working a few hours each day. And that includes pre-washing and pressing fabrics. I never could have done that without the GO!
The amount of each fabric you will need depends on how you decide to arrange your colors. Figure how many of each piece you will need of each of your fabrics. To conserve fabric, you will rough-cut pieces that are a little larger than the shapes you want to cut. You can do this easily by cutting strips of fabric just a little wider than the shape. You can “accordion fold” the strip to give you six layers of fabric. After a few cuts, you’ll get into a rhythm and the cutting will go fairly quickly. I was able to cut the shapes for a king size quilt (105" x 105" - 64 blocks) in about a week, working a few hours each day. And that includes pre-washing and pressing fabrics. I never could have done that without the GO!
The AccuQuilt GO! ® Fabric Cutter will cut your shapes with great precision. It’s very important to sew accurate 1/4" seams when assembling the pieces.
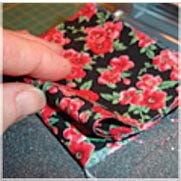
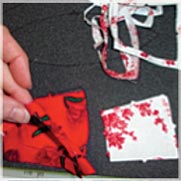
When I was assembling the shapes, I used a few tricks to check myself
along the way. I cut one solid arc shape. After assembling the small
shapes to make an arc, I checked the pieced arc against the solid arcs
to make sure my piecing was accurate.
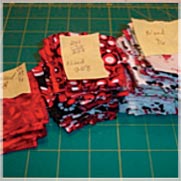
It’s important to stay organized when piecing the arcs. If you make piles and use labels, you’ll save yourself time and frustration. Chain-piecing helps, too!
It’s important to stay organized when piecing the arcs. If you make piles and use labels, you’ll save yourself time and frustration. Chain-piecing helps, too!
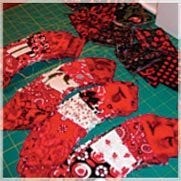
When you start assembling the units, take your time. Really pay attention to your accuracy.
It helped me to take a few stitches in place, leave my needle down,
lift my presser foot, and pivot the fabric when I came to the points.
Press often, and do your best to press seams in opposing directions to
reduce bulk on the back. If your fabric feels a little limp after
pre-washing, it may help your accuracy to use spray starch or pressing
spray.
When it’s time to bind your quilt, use a
tape measure to measure around the perimeter and add several inches to
that number to determine the length of binding needed. It’s
critical that you use bias binding for this quilt. I also found that it
helped to use a binding that was a little thinner than I generally use.
Take your time and maintain your accurate 1/4" seam when applying the
binding, paying close attention to your accuracy when you reach the
point where the arcs meet. It helped me to take a few stitches in place
when I arrived at that point and pivot the fabric. In a few cases, I
actually took my needle out and adjusted the fabric before resuming my
stitching.
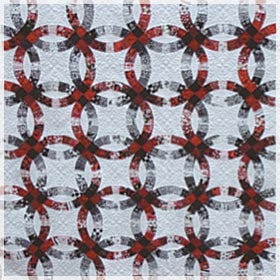
I’m thrilled with my
finished quilt and I’m sure my son and his wife will treasure it and
hand it down to the next generation. I’m so thankful that I had my GO!
to cut the shapes. The accuracy I was able to achieve using the GO! helped me to create a king size quilt that hangs flat as a pancake!

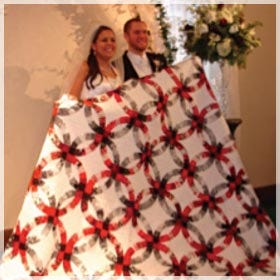
My quilt won
the first place Viewers’ Choice Award at our guild quilt show, and it
will be shown in the International Quilt Festival of Ireland in the
summer of 2012. The picture above was taken at that Westside
Quilters Guild show in Hillsboro, Oregon in 2011. I’m on the left and my
long-arm quilter, Sandy Pennington, is on the right.
I’m going to make another Double Wedding Ring quilt soon for my other son and his wife. I’ll be blogging about it in detail at
www.alderwoodquilts.blogspot.com.
www.alderwoodquilts.blogspot.com.
About Blogger:
Sue Hauser has been sewing since she was 12 years old and has been an avid quilter for the last 15 years. She is the owner of Alderwood Quilts, an online quilt shop based just outside of Portland, Oregon. She and her husband also own a small lavender farm. When she’s not sewing, you’re likely to find her in her lavender field tending the fragrant crop.www.alderwoodquilts.com
www.sunsetlavender.com


